For Beginners :
When building a robot, take the examples and add other techniques to improve the Robot much better, here I leave for beginners, where to look for data, some will spend a little money, others will do it with household objects, the important thing is to do it, According to what is requested and That works, I leave the following link. some people are experts, do not let that take away your dream.
Robot Building for Beginners
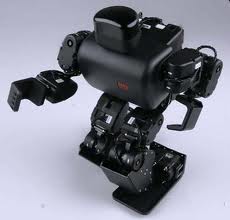
Robot Building for Beginners. Building a robot can be challenging for the beginner, but stay with me and I will show you several ways that even a person with little or no technical knowledge can easily build robots.
The technologies of robotics run wide and deep. There is vision, robot intelligence, voice recognition, robot voice, robot locomotion (wheels, legged or flying robots), robot arm movement, just to name a few. In times past, if you were not an electronic engineer, a computer programmer, a mechanical engineer, and a person with hundreds of hours every month, you could not build a robot. Time and technology has changed all that. Robot building, even building robots from scratch has matured to a place where even a 12 year old average kid can build a robot in a short while--even faster that a 12 year old kid of 30 years ago could build a model boat or plane. It really has gotten a whole lot easier to build robots.
In the next few paragraphs I’m going to list out the easiest to the hardest way to build a robot. This will really be robot building for beginners. The harder ways will just be put there for reference. You as a robot hobbyist may never construct a scratch-built ‘bot, but it is nice to know a bit about how to do it. You will also see links to other robotic web pages that will give you more information on that type of robot building.
Pre-built Robots
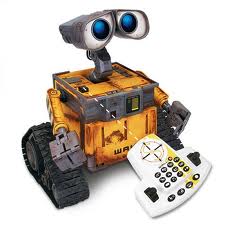
The simplest robot to build is one that is already built. And by already built I’m not talking about some toys although some of the toys these days such as the Ultimate Wall-e as well as the R2D2 Mechanical ‘Droid are quite sophisticated pre-built robots. Another is Tomy’s humanoid robot the i-Sobot. These robots require little work aside from installing or charging a set of batteries. Sometimes the hardest work is just getting the darn 'bot out of its box. Robot building for beginners can include the challenge of box opening!
Competition Robots

The first pre-built robots worth talking about are the competition robots such as line following robots and sumo wrestling robots. While not many are not actually kits, they can introduce one to a lot of robotic concepts and some can be programmed. At a price point under $100 these “toys” are more sophisticated than many scratch built robots. They make easy robot building for beginners.
There are also Sumo Robot kits ranging from about $50 to more than $300. The Elenco OWI-9647 Sumo Robot that attempts to push other sumobots out of the arena that can be had for about $50.
Parallax’s Scribbler Robot is a “reprogrammable fully-assembled line following robot". You have the option of programming this little line following bot in the Scribbler Program Maker GUI (Graphical User Interface) language, a point and click graphically programming language. It is about $100 to build simple robots with this one.
Humanoid Beginners Robot Building

You think you can't build simple robots that look like people? The next level of robot building are complete kits are at an intermediate challenge for the robot builder. Like building a model car or plane, these all-in-one kits contain everything including step-by-step instructions, a person, even a 12 year old boy needs to construct a robot from parts alone. The Aldebaran Robotics Nao Humanoid Robot Academic Edition v3plus at more than $17,000 brings home robotics to a new and sophisticated level. This is robot building for beginners with STYLE!
Educational Robot Kits: VEX and Boe-Bots

Following the complete robot kits are the educational robotic kits. These are kits where the student can learn all about robot building while building several different version of robots. As with a lot of educational products, most are quite expensive. The top educational kits are the VEX robot kits which can take someone from no knowledge to a fairly sophisticated level of robotics in just a few weekends.
Parallax.com
says the Boe-Bot is the “most complete reprogrammable robot kit and is a great resource for STEM programs. No previous robotics, electronics, or programming experience is necessary.” At a bit over $150 it is a reasonably priced educational robotic system.
Leggo my Lego Minstorms Robot
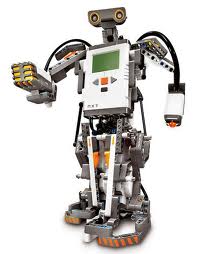
Lego, the people that had kids putting up plastic sky scrapers since the 1940s, came up with a Lego robotics line of toys in 1998 and has been improving upon their Lego "brick" micro-controller ever since.
Finally it's time to discuss scratch builting robots vs. easy robot building. In the ancient times, say around 1980 or so, hobbyists were building robots of every size and shape. These scratch built robots usually were never “finished”, cost gobs of money, did little if anything useful, and took years of weekends to even get a basic robot to roll around a room. Most could not pick up anything. Many were dangerous, carrying along 12 volt car batteries, sloshing hydrochloric acid and spewing hydrogen gas which was expelled whenever one recharged them. They could cause an acid burn or even an explosion if one were not careful.
Click HERE to learn How to Build a Robot with Lego Mindstorms
We’ve come a long way from that and this author has come up with a method of scratch-building a robot that I call "super easy robot building." This uses a standard micro controller, servos for both robot arms and moving the robot around a room and plug-in range detectors to keep the little droids from slamming into walls, chairs and friends shins. See my robot building articles elsewhere on this site.
Click HERE to learn about robot building for beginners
The Newest Product for the Beginner: The EZ-Robot System
There is a new player on the beginner robot builder's block, and it's called the EZ-Robot. It claims to make robot building simple enough for kids and even frustrated adults. The world needed a better robot board and this might just be it. Click below to see a review of this intriguing new product and all that it promises.
EZ Robot Building with the EZ Robot Board
http://www.robots-and-androids.com/robot-building-for-beginners.html
Free......

Lessons Menu:
Programming is usually the final step involved in building a robot. If you followed the lessons, so far you have chosen the actuators, electronics, sensors and more, and have assembled the robot so it hopefully looks something like what you had initially set out to build. Without programming though, the robot is a very nice looking and expensive paperweight.
It would take much more than one lesson to teach you how to program a robot, so instead, this lesson will help you with how to get started and where (and what) to learn. The practical example will use “Processing”, a popular hobbyist programming language intended to be used with the
Arduino microcontroller
chosen in previous lessons. We will also assume that you will be programming a
microcontroller
rather than software for a full-fledged computer.
What Language to Choose?
 There are many programming languages which can be used to program microcontrollers, the most common of which are:
-
Assembly
; its just one step away from machine code and as such it is very tedious to use. Assembly should only be used when you need absolute instruction-level control of your code.
-
Basic;
one of the first widely used programming languages, it is still used by some microcontrollers (
Basic Micro
,
BasicX
,
Parallax
) for educational robots.
-
C
/
C++;
one of the most popular languages, C provides high-level functionality while keeping a good low-level control.
-
Java
; it is more modern than C and provides lots of safety features to the detriment of low-level control. Some manufacturers like
Parallax
make microcontrollers specifically for use with Java.
-
.NET
/
C#
; Microsoft’s proprietary language used to develop applications in Visual Studio. Examples include
Netduino
,
FEZ Rhino
and
others
).
-
Processing
(
Arduino
); a variant of C++ that includes some simplifications in order to make the programming for easier.
-
Python
, one of the most popular scripting languages. It is very simple to learn and can be used to put programs together very fast and efficiently.
In
lesson 4
, you chose a microcontroller based on the features you needed (number of I/O, user community, special features, etc). Often times, a microcontroller is intended to be programmed in a specific language. For example:
If you have chosen a hobbyist microcontroller from a known or popular
manufacturer
, there is likely a large book available so you can learn to program in their chosen programming language. If you instead chose a microcontroller from a smaller, lesser known manufacturer (e.g. since it had many features which you thought would be useful for your project), it’s important to see what language the controller is intended to be programmed in (C in many cases) and what development tools are there available (usually from the chip manufacturer).
Getting Started
 The first program you will likely write is
“Hello World”
(referred to as such for historic reasons). This is one of the simplest programs that can be made in a computer and is intended to print a line of text (e.g. “Hello World”) on the computer monitor or LCD screen. In the case of a microcontroller, another very basic program you can do that has an effect on the outside world (rather than just on-board computations) is toggling an IO pin. Connecting an LED to and I/O pin then setting the I/O pin to ON and OFF will make the LED blink. Although the simple act of turning on an LED may seem basic, the function can allow for some complex programs (you can use it to light up multi-segment LEDs, to display text and numbers, operate relays, servos and more).
Step 1
: Ensure you have all components needed to program the microcontroller
Not all microcontrollers come with everything you need to program them, and most microcontrollers need to be connected to a computer via USB plug. If your microcontroller does not have a USB or DB9 connector, then you will need a separate USB to serial adapter, and wire it correctly. Fortunately many hobbyist microcontrollers are programmable either via an RS-232 port or by USB, and include the USB connector on-board which is used not only for two-way communication, but also to power the microcontroller board.
Step 2
: Connect the microcontroller to the computer and verify which COM port it is connected to. Not all microcontrollers will be picked up by the computer and you should read the “getting started” guide in the manual to know exactly what to do to have your computer recognize it and be able to communicate with it. You often need to download “drivers” (specific to each operating system) to allow your computer to understand how to communicate with the microcontroller and/or the USB to serial converter chip.
Step 3
: Check product’s user guide for sample code and communication method / protocol
Don’t reinvent the wheel if you don’t have to. Most manufacturers provide some code (or pseudo code) explaining how to get their product working. The sample code may not be in the programming language of your choice, but don’t despair; do a search on the Internet to see if other people have created the necessary code.
-
Check product manuals / user guides
-
Check the manufacturer’s forum
-
Check the internet for the product + code
-
Read the manual to understand how to write the code
Useful Tips
-
Create manageable chunks of functional code: By creating segments of code specific to each product, you gradually build up a library. Develop a file system on your computer to easily look up the necessary code.
-
Document everything within the code using comments: Documenting everything is necessary in almost all jobs, especially robotics. As you become more and more advanced, you may add comments to general sections of code, though as you start, you should add a comment to (almost) every line.
-
Save different versions of the code – do not always overwrite the same file: if you find one day that your 200+ lines of code do not compile, you won’t be stuck going through it line by line; instead you can revert to a previously saved (and functional) version and add / modify it as needed. Code does not take up much space o a hard drive, so you should not feel pressured to only save a few copies.
-
Raise the robot off the table or floor when debugging (so its wheels/
legs
/
tracks
don’t accidentally launch it off the edge), and have the power switch close by in case the robot tries to destroy itself. An example of this is if you try to send a servo motor to a 400us signal when it only accepts a 500 (corresponding to 0 degrees) to 2500us (corresponding to 180 degrees) signal. The servo would try to move to a location which it cannot physically go to (-9 degrees) and ultimately burn out.
-
If code does something that does not seem to be working correctly after a few seconds, turn off the power – it’s highly unlikely the problem will “fix itself” and in the meantime, you may be destroying part of the mechanics.
-
Subroutines may be a bit difficult to understand at first, but they greatly simplify your code. If a segment of code is repeated many times within the code, it is a good candidate to be replaced with a subroutine.
Practical Example
 We have chosen an Arduino microcontroller to be the “brain” of our robot. To get started, we can take a look at the
Arduino 5 Minute Tutorials
. These tutorials will help you use and understand the basic functionality of the Arduino programming language. Once you have finished these tutorials, take a look at the example below.
For the robot we have made, we will create code to have it move around (left, right, forward, reverse), move the two servos (pan/tilt) and communicate with the distance sensor. We chose Arduino because of the large user community, abundance of sample code and ease of integration with other products.

Distance sensor
Fortunately in the Arduino code, there is an example for getting values from an analog sensor. For this, we go to File -> Examples -> Analog -> AnalogInOutSerial (so we can see the values)
Pan/Tilt
Again, we are fortunate to have sample code to operate servos from an Arduino. File -> Examples -> Servo -> Sweep
 Note that text after two slashes // are comments and not part of the compiled code
#include
// This loads the servo script, allowing you to use specific functions below
Servo myservo; // create servo object to control a servo
int pos = 0; // variable to store the servo position
void setup() // required in all Arduino code
{
myservo.attach(9); // attaches the servo on pin 9 to the servo object
}
void loop() // required in all Arduino code
{
for(pos = 0; pos < 180; pos += 1) // variable ‘pos’ goes from 0 degrees to 180 degrees in steps of 1 degree
{
myservo.write(pos); // tell servo to go to position in variable ‘pos’
delay(15); // waits 15ms for the servo to reach the position
}
for(pos = 180; pos>=1; pos-=1) // variable ‘pos’ goes from 180 degrees to 0 degrees
{
myservo.write(pos); // tell servo to go to position in variable ‘pos’
delay(15); // waits 15ms at each degree
}
}
Motor Controller
 Here is where it gets a bit harder, since no sample code is available specifically for the Arduino. The controller is connected to the Tx (serial) pin of the Arduino and waits for a specific “start byte” before taking any action. The
manual
does indicate the communication protocol required; a string with specific structure:
-
0x80 (start byte)
-
0x00 (specific to this motor controller; if it receives anything else it will not take action)
-
motor # and direction (motor one or two and direction explained in the manual)
-
motor speed (hexadecimal from 0 to 127)
In order to do this, we create a character with each of these as bytes within the character:
unsigned char buff[6];
buff[0]=0x80; //start byte specific to Pololu motor controller
buff[1]=0; //Device type byte specific to this Pololu controller
buff[2]=1; //Motor number and direction byte; motor one =00,01
buff[3]=127; //Motor speed “0 to 128” (ex 100 is 64 in hex)
Serial.write(buff);
Therefore when this is sent via the serial pin, it will be sent in the correct order.
Putting all the code together makes the robot move forward and sweep the servo while reading distance values.
You can see the full robot and the
user manual
.
https://www.robotshop.com/blog/en/how-to-make-a-robot-lesson-10-programming-your-robot-2-3627
Great!